Achieving the Pinterest-Worthy Basket Wall
- amanda brow

- Dec 26, 2020
- 3 min read
I feel like I constantly have five or six home improvement projects going in my head at the same time. Ya feel me?? There’s always a wall that needs a splash of color or a poster, or a boring pantry door that’s begging for a new life, or an empty corner destined for something cozy.
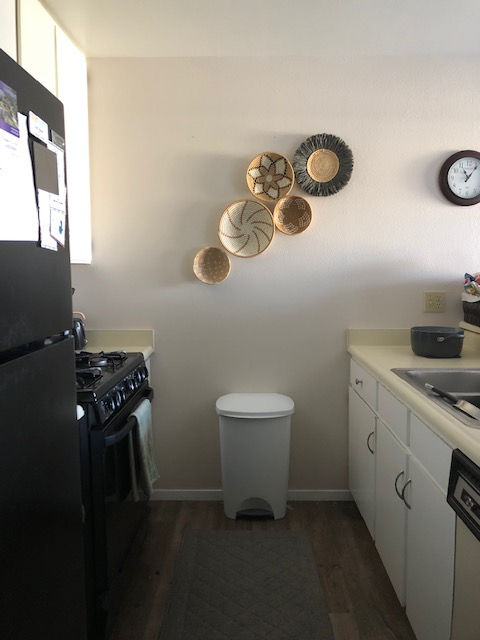
I’ve been staring at this blank wall in our kitchen since we moved in. It had a brief life holding up a shelf lined with coffee mugs, but one Saturday morning my shoulder bumped it just right and sent all our favorite mugs flying. Cue the waterworks and a floor covered in ceramic shards. Needless to say, it’s been empty since then.
Recently I came across these cool decorative basket walls and a lightbulb went off in my head. Perfect. Modern, decorative, as sprawling as I want, and even if I do send it crashing off the wall, it won’t shatter. Let's do this.
The Process

Acquiring
These baskets were actually a Christmas present from my mama (thanks, Mom!!), but before they went on my Christmas list, I spent a good chunk of time scouting out places to find baskets like these.
The first mistake people make, in my opinion, is springing for the $500 set at Pottery Barn (don’t do that!!!). The much-cooler version of spending most of a part-time paycheck on baskets, of all things, is right at your fingertips: ETSY. You can get them in a hand-woven set, or you can go shop by shop and purchase your own unique set.
Another (more labor-intensive) version of this is thrifting your basket sets. I’ve found flat baskets like these mostly in the kitchen section, whether it’s at Goodwill or a more local second-hand shop (in MB, my favorites are Foxys and Achievement House). If they don’t have a little spot for hanging on the back, you can easily affix a soda tab or loop of yarn on the back with hot glue.
Arranging
Funny story: for as long as I can remember, I’ve always stuck things up on the wall with thumb tacks. I think it stems from lack of confidence with a hammer and wanting to move things around so often, but in any case, it’s kind of a pain. I used to tack something up and then want it to be just a couple inches to the left, and then, ohp, nope, a little bit to the right, and then before you know it, I’ve spent an hour and twenty tiny holes to get one dang picture on the wall.
And then: I saw this amazing hack on Pinterest that helps arrange your decorations before they ever get to the wall and ensures you get it right every time, the first time. Ready for this??
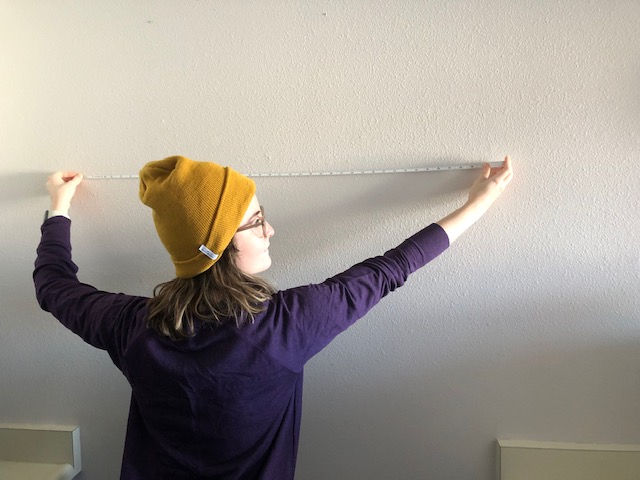
Step one: measure out the space on your wall you’re decorating. I was more concerned about the width of my project wall than the height, so I focused more on the width when measuring.
Then, roll out a length of wrapping paper, blank side up, measured to match your project wall. Weigh down all four sides so it won’t curl up on you with, say, a couple of coffee mugs, a festive candle, and a garlic shredder.

Now: play! Lay out each decoration on the paper and mess around with the arrangement until you get one you like (admittedly, I scrolled through decorative basket walls on Pinterest for inspiration. No shame).
When it looks just like you want, trace an outline of each of the baskets on the paper. Pro tip: LABEL each outline while it’s on the ground (the one with hair, the spiral one, etc) so you don’t put it up on the wall upside down and make yourself look like a fool. Lol.

Next: get the big paper up on the wall. I used thumb tacks (what else is new), but in other projects, tape worked just as well.
Here’s the fun part: for each traced basket, stick a thumb tack (or, fine, a nail) where you’d expect the hanging loop to be. Then, hang each of your baskets up using these nails, tearing off the paper as you go.
And viola! You’ve got a gorgeous wall, exactly like you wanted it, the first time. Whew. Give yourself a pat on the back, folks. You earned it.


Comments